


If you are loving the pampas grass trends right now as much as I am than you will love this beautiful diy dried Pampas grass decor piece for your home! This is a fun and easy project to do that…


building a simple and beautiful life from the Table to the backyard.

If you are loving the pampas grass trends right now as much as I am than you will love this beautiful diy dried Pampas grass decor piece for your home! This is a fun and easy project to do that…
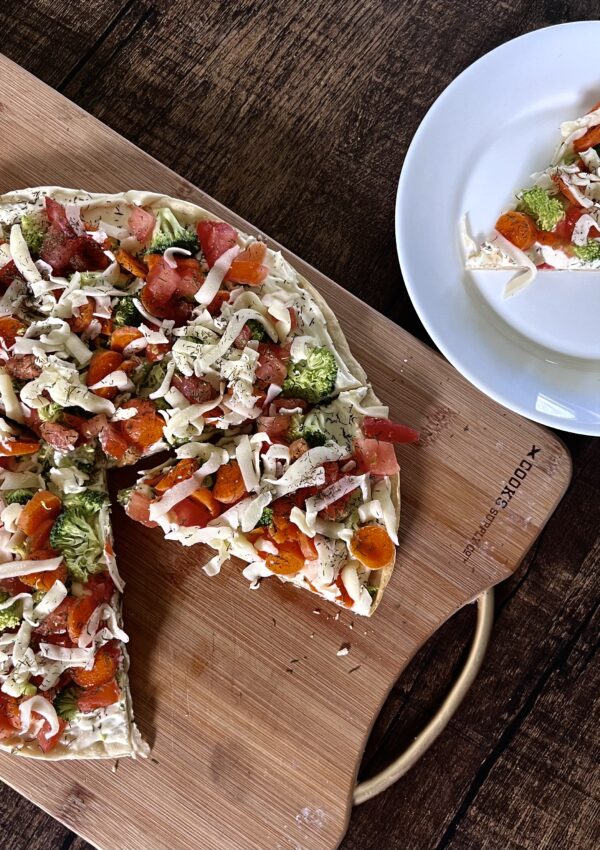
This sourdough veggie pizza recipe is my take on the classic cold veggie pizza that is typically made with crescent roll dough. This is a delicious appetizer or light lunch and a great way to use up those leftover veggies…
If you like a thick and soft sugar cookie this is a recipe you will love! These 4th of July sugar cookies will be a hit at any picnic and pool party you attend this year! This recipe has…
This list of the best funny and heartfelt quotes for Mother’s Day is a perfect way to share some humor with your own mom or any other mom you want to wish a very happy Mother’s Day to! They say…
These homemade sourdough triple chocolate pop tarts are a delicious and nostalgic treat. The thought of making a homemade pop tart can sound intricate and intimidated, but these are actually very simple and you’ll be surprised at how easy it…
If you have a bearded man in your life, you are going to want to try this natural conditioning Beard balm recipe! Guys don’t typically have a lot of steps involved in their morning routines, but men with beards have…